Tutorial
INK-BP-001
How to Position Your Prints Perfectly Every Time
A Simple Guide for InkFlex Users
Correct placement is essential for balanced, professional-looking prints. These universal guidelines work for T-shirts, hoodies, crewnecks, polos, and long sleeves, for both adults and kids.
1. Understanding Your Reference Points: Collar vs. Neckline
Before measuring, it is important to know where placement begins.
- •Collar: The ribbed band or extra fabric sewn around the neck opening.
- •Neckline: The inner edge of the garment opening.

Always measure from the neckline, not from the top of the collar, for accurate height placement on any garment.
2. Standard Placement Guidelines
These measurements work universally and can be adjusted slightly depending on garment size.
A. Full Front Prints

Adults
- •3 to 4 inches below the neckline
- •Centered horizontally
- •Use 3 inches on larger shirts
- •Use 4 inches on smaller shirts
Kids and Youth
- •2.5 to 3 inches below the neckline
- •Centered horizontally
B. Left Chest Logos

Adults
- •4 inches down from the neckline
- •3 to 4 inches right of the garment centerline
Kids and Youth
- •3 to 3.5 inches down
- •2.5 to 3 inches right of centerline
C. Back Prints

Adults
- •3 inches below the back neckline
- •Centered horizontally
Kids and Youth
- •2.5 inches below the neckline
For hoodies, begin measuring just below the seam where the hood attaches.
D. Sleeve Prints (Short and Long Sleeves)

Sleeve designs require extra care to avoid twisting once worn.
Universal Guidelines
- •Lay the sleeve completely flat
- •Position the print in the visual center, halfway between the top seam and the sleeve hem
- •Keep the print parallel to the sleeve length
- •For long sleeves, start 2 to 3 inches above the wrist cuff
Approximate distances
- •Adults short sleeve: center 2.5 to 3 inches from shoulder seam
- •Kids short sleeve: center about 2 inches from shoulder seam
- •Long sleeves: center lengthwise, 1.5 to 2 inches from the top seam
3. If You Have the InkCognito Alignment Guide

The guide provides clear visual placement references.
- •Purple Line: Center for full fronts, full backs, and long designs
- •Red and Orange Lines: Top Front and Top Back for recommended starting heights
- •Lime Line: Left Chest for logos and small badges
- •Aqua Line: 15 Degree Angle for angled or stylized graphics
- •Outer Rulers to measure neckline distance, sleeve placement, and scale for adult or youth sizes
Simply align the garment with the rulers and match the print to the correct line.
4. If You Do Not Have the Alignment Guide
You can still achieve perfect placement using simple tools.
- •Measuring tape
- •Ruler
- •Heat resistant tape
- •Flat table or heat press
- •Optional center markers placed on the garment only
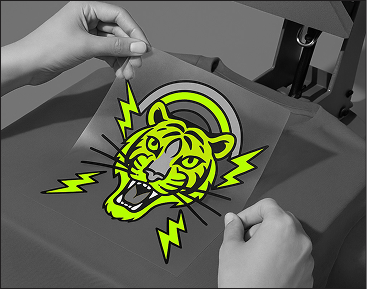
How to Position Without the Guide
- 1.Smooth the garment and prepare it flat.
- 2.Find the garment center using one of these safe methods.
Method A: Shoulder to Shoulder Fold
- •Gently fold the garment shoulder to shoulder.
- •Create a very light crease down the middle to mark the center.
- •Lay the garment flat again.
- •This crease now shows the exact garment center.
Method B: Measurement Method
- •Measure the width of the garment.
- •Divide by two.
- •Mark that point mentally, with a ruler edge, or with removable tape.
- 3.Find the center of the transfer sheet by measuring its width.
- 4.Match the garment center with the transfer center.
- 5.Measure vertical placement from the neckline.
- 6.Use seams as alignment helpers.
- 7.Step back a few feet and check balance visually.
- 8.Use light tape if the transfer sheet tends to shift.
5. Final Tips and Checklist for Accurate Placement
Before pressing, make sure:
- •The garment is completely flat, smooth, and lint free
- •Vertical placement is measured from the neckline
- •Horizontal alignment is correct meaning garment center equals transfer center
- •The transfer sheet is fully flat with no lifted corners
- •Sleeve prints are straight and parallel to the sleeve
- •Distances are adjusted for youth sizes and hoodies
- •The transfer has not shifted while positioning
- •A final visual check has been done
Once everything is aligned, you are ready to press with confidence.
Tags